
News
Mastering how to screenshot on mac book and laptop effectively
May
Navigating the various methods for screen capture can initially seem overwhelming due to the variety of key combinations available. However, once you understand the logic behind each specific command, the process becomes second nature and significantly enhances your overall efficiency. Whether you are creating a tutorial, saving a receipt, or collaborating on a design project, knowing which tool to use at the right moment is vital. This guide explores every dimension of visual capture, providing professional insights into the most effective techniques for high-quality results on your specific Apple hardware device today.
🚀 Essential Shortcut Reference
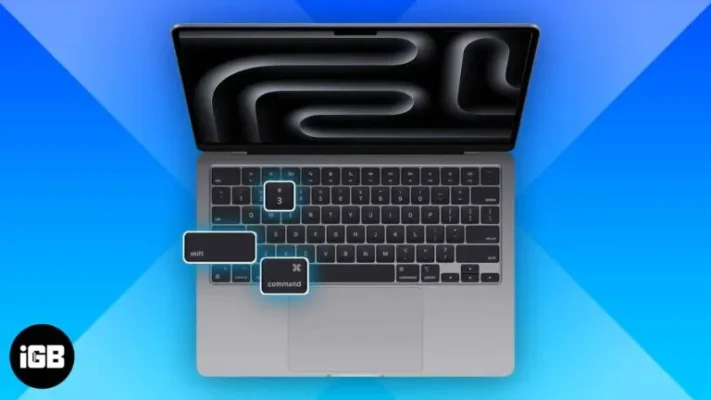
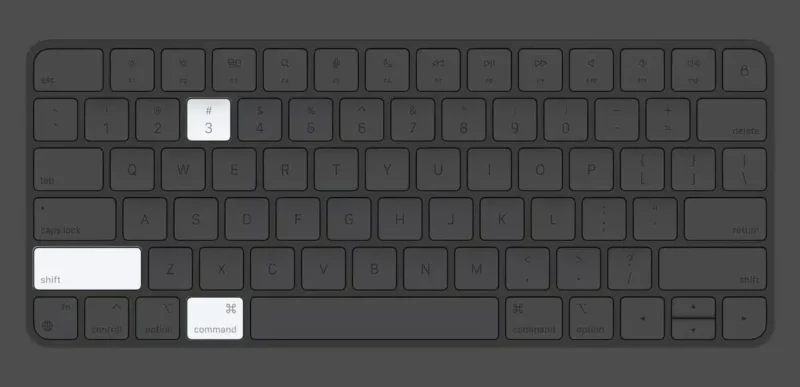
- • Shift + Command + 3: Captures the entire screen immediately.
- • Shift + Command + 4: Turns the cursor into a crosshair for area selection.
- • Shift + Command + 5: Opens the comprehensive screenshot and recording menu.
- • Control Key: Add this to any shortcut to copy the image to your clipboard.
The foundational macbook screenshot shortcut combinations
The core of Apple’s capture system relies on three primary key combinations that have remained consistent across several iterations of the operating system. The most basic macbook screenshot shortcut is the entire screen capture, which creates a precise image of everything currently visible on your display. This is particularly useful for archiving entire web pages or desktop layouts where context is just as important as the central content itself.
When you initiate an entire screen capture, macOS generates a high-resolution PNG file by default, preserving the sharpness of text and UI elements. This file is typically deposited on your desktop with a timestamped name, making it easy to locate and organize later. Understanding this fundamental behavior is the first step toward building a more complex visual workflow that allows for rapid sharing and precise data archiving.
Precision area selection and window capture techniques
Often, capturing the full display includes unnecessary clutter that can distract from the main subject of your image. Utilizing the selective capture command allows you to define a specific rectangular region by dragging a crosshair across the desired area. This precision ensures that you only share the most relevant information, which is a hallmark of professional communication and clean documentation practices.
Beyond simple rectangles, you can also target specific windows or menus with surgical accuracy by using the space bar modifier. After pressing the area selection shortcut, hitting the space bar transforms the crosshair into a camera icon. Clicking on any open window will capture that specific element with a clean drop shadow, even if it is partially obscured by other applications on your desktop workspace.
💡 Professional Pro Tip
When using the area selection tool (Cmd+Shift+4), you can hold the Space bar after starting your selection to move the entire selected box. Additionally, holding Shift will lock the aspect ratio or a specific axis, allowing for pixel-perfect adjustments before you release the mouse to finalize the capture.
Advanced workflows: how to screenshot on mac and paste
A frequent requirement in fast-paced environments is the ability to transfer visuals directly into documents or messages without creating clutter on the desktop. Mastering how to screenshot on mac and paste involves integrating the Control key into your standard shortcut routine. This simple modification redirects the final image from the storage drive to the system clipboard, ready for immediate use.
Once the image is stored in the clipboard, you can navigate to any application like Slack, Microsoft Word, or an email client and use the standard paste command. This method significantly reduces the time spent managing files and cleaning up your desktop after a long session of gathering visual evidence. It is the preferred method for developers, designers, and project managers who prioritize speed and organizational hygiene.
Maximizing efficiency on a macbook laptop display
When working on a how to screenshot on macbook laptop basis, screen real estate is often limited compared to larger external monitors. This limitation makes the use of floating thumbnails and immediate editing tools even more valuable for the mobile professional. After taking any shot, a small preview appears in the bottom right corner of the display, serving as a gateway to powerful markup features.
Clicking this thumbnail opens the Markup window, where you can add arrows, text boxes, and shapes to highlight specific areas of interest. This interactive layer allows you to provide context and direction without ever opening a heavy image editor like Photoshop. For those on the move, these integrated tools turn every visual capture into an actionable piece of communication that requires minimal effort to produce.
The power of the Shift + Command + 5 Capture Menu
Introduced in more recent versions of macOS, this specific command opens an on-screen toolbar that centralizes every possible capture and recording tool. This interface allows you to choose between capturing the entire display, a window, or a custom area while also offering screen recording capabilities. For users who need to create dynamic video content or show movement, this menu is an indispensable asset.
The “Options” tab within this menu is where the true customization happens for your visual workflow. Here, you can change the default save location from the Desktop to a specific folder, Documents, or even your Mail application. You can also set a timer of five or ten seconds, which provides enough time to arrange menus or hover states that would otherwise disappear when you press a key combination.
Customizing file formats and technical settings
While the default PNG format is excellent for image quality and precision, it can result in large file sizes that may not be suitable for web uploads or storage-constrained environments. Advanced users can utilize the Terminal application to change the default file format to JPG, PDF, or TIFF depending on their specific needs. This level of technical control ensures that your output is always optimized for its final destination.
Another common customization involves disabling the drop shadow that appears on window captures. While the shadow adds a professional aesthetic, it can interfere with layout designs or technical diagrams where flat edges are required. By executing a simple command in the Terminal, you can strip away the shadow, resulting in a perfectly clean edge that integrates seamlessly into any professional presentation or documentation project.
🛡️ Verification and Reliability
Native macOS screenshot tools are deeply integrated into the kernel, meaning they are far more reliable and secure than external applications. They respect system privacy settings, ensuring that sensitive data is not leaked to third-party servers. Always rely on these built-in security protocols for any confidential work or internal business communication.
Managing screenshots on multi-monitor configurations
If your professional setup involves connecting your laptop to external displays, the behavior of the capture system adjusts to accommodate the increased workspace. Pressing the entire screen shortcut will generate multiple files simultaneously—one for each active monitor. This ensures that no part of your extended desktop is missed, providing a comprehensive snapshot of your entire multi-display environment in a single action.
When using the area selection tool across multiple screens, the crosshair moves fluidly between the displays. This allows you to capture elements that might straddle the boundary between two monitors. For creative professionals working on large-scale canvases, this seamless integration is vital for maintaining a consistent perspective and ensuring that high-fidelity visuals are captured without any alignment issues or visual artifacts.
Automating your capture organization strategy
For high-volume users, the influx of images on the desktop can quickly become unmanageable. Implementing a strategy for automated organization is key to maintaining a long-term productive environment. Beyond changing the save location in the capture menu, you can use macOS “Folder Actions” to automatically rename, tag, or move your captures based on specific rules you define. This automation turns a manual task into a streamlined system.
For example, you can set a rule that any image containing the word “screenshot” in its name is automatically moved to a dedicated “Project Assets” folder and tagged with a “To Review” label. This systematic approach ensures that you never lose an important piece of information and that your workspace remains clean and professional. It is these small organizational habits that differentiate an average user from a truly efficient macbook power user.
📋 Critical Workflow Summary
Review these final steps to ensure you are capturing like a professional:
- Select the right shortcut (Area vs Window) to reduce image noise.
- Use the Control key modification for instant pasting into communication apps.
- Leverage the Markup tool immediately to provide context for your team.
- Clean your desktop regularly or automate file movements to stay organized.
- Adjust Terminal settings if you require specific formats like JPG or PDF.
Troubleshooting common screen capture errors
Occasionally, users may find that their shortcuts stop working or the floating thumbnail fails to appear as expected. The most common cause is a conflict with other applications that use global hotkeys, which can override the native macOS commands. Checking your System Settings under the Keyboard section will allow you to verify that the shortcuts are still properly mapped and enabled for your user account.
Another frequent issue involves capturing content in protected applications, such as streaming services or some banking software. For copyright and security reasons, macOS will often black out the capture area in these specific instances. This is a deliberate security feature and cannot be bypassed using standard methods. Understanding these technical limitations helps manage expectations and encourages the use of alternative documentation methods when dealing with highly sensitive or protected digital content.
Advancing toward visual documentation mastery
In conclusion, the ability to capture and share visual information is a fundamental pillar of modern professional life. By integrating these shortcuts and customization techniques into your daily routine, you elevate your status from a casual user to a documentation expert. The tools provided by Apple are designed to be powerful yet intuitive, offering a level of precision that meets the demands of even the most rigorous professional environments.
Take the time to experiment with the various modifiers and settings discussed in this guide. Whether you are focusing on entire displays or specific UI elements, the consistency and quality of your captures will become a signature of your professional output. As digital environments continue to grow in complexity, your mastery of these visual tools will remain a vital asset in your arsenal, allowing you to communicate clearly, effectively, and with total technical confidence on your Apple device.